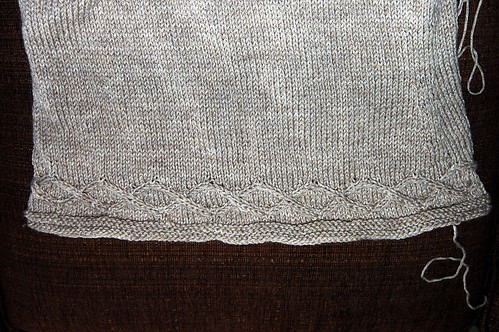
 I have tried this sweater on and it fits me wonderfully. It is a well designed pattern, made to nicely hug a girls curves. Which means waist shaping and short rows. The waist shaping is just increases and decreases. Elementary school stuff. Short rows now, are the devil's handywork. Not that they are hard. I've tried every version out there and no, they are not hard to execute. They just don't ever look good. Ever....So I will keep trying any new technique that comes along and see if someday I don't find a way I like a little more. Cause, boy, they do make a sweater fit like a sweater should. I also have not yet, found a way to get my underarms to look just right. These turned out pretty well for once. But not till I fussed with them a bit. First thing was to really tighten up the armhole stitches that were going to go on the holders for later joining. I mean really tighten. Then when you put them back on the right sized needle to do a 3 needle bind off from the inside, you have to work to get them on. And the extra yarn comes from the last stitches on the body section. So that tightens up that side on both the sleeve and body. But that leaves the side where you have your yarn tail still a bit loose. You kind of fix that by pulling the tail as tight as you can when you start the 3 needle bind off. But still I always manage to have a bit of a hole at the join. So I try to pull any looseness in the stitches away from the gap and out into the body of the peice until the looseness is distributed over many stitches instead of just 1 or 2. I actually like knitting sweaters from the top down just a little bit better because it allows you to pick up an extra stitch on each side of the armhole seam when you are picking up stitches to knit on down the body or sleeves. But enough of all this. I am not good at any tutorial stuff. Better left for those who are. Just know that this sweater is a lovely knit and I may even make it again. Maybe I will try to re-engineer it to be top down.
Next up on the agenda is my wonderful woad dyeing success. I have only once messed with using any kind of indigo and that was a chemical vat with indigo granules. That was fun but I wanted to see if I could get that same blue with something I could grow myself. So into my dye garden this year went both woad and indigo. I decided to go with woad first. The leaves are larger and faster to pick was the only reason. So I stuffed a 1 gallon glass jar full of the leaves. Then poured nearly boiling water just to cover the leaves and left it sit for 1 hr.
 The liquid was then a sherry brown and barely cool enough to touch. I strained off the liquid and squeezed the leaves to get out all I could. Then into that went 1 Tablespoon of ammonia. The next step is kinda fun. You get to pour this liquid back and forth between 2 containers, to incorporate air, til it starts to get frothy, blue and has a coppery sheen to it. It didn't take long at all for this to happen to mine. I probably should have kept up the aeration for a bit longer according to my directions but I really didn't have the best containers and I was getting sloppy and losing some of my dye liquor. Besides it was blue and I was a bit over excited at this point!!
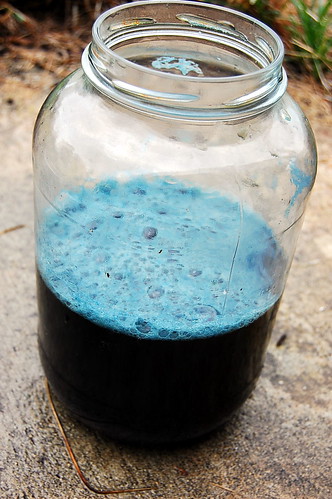 Next step requires you keep this liquid at a very stable precise temperature of between 100 and 120F. So I made a water bath out of a large shallow stock pot, put in my glass jar and kept my electric stove on its lowest setting. I checked the temp every 10 minutes or so, and turned off the stove if it started to get a bit high. Then you add 1 Tablespoon of Rit color run remover. Stir very gently and cover. The dye remover reduces the liquid, meaning it removes all the oxygen. It takes the indigo blue, which is not water soluble and changes it into indigo white which is. The liquid is now supposed to go yellow green on you in the space of an hour or so. And if not, add more color remover and wait. So of course, mine stays blue. Even after a second dose.
But my reducing agent was old, from last year. And this stuff is a bit fragile so I think it was very weak. But I threw in a ready sample, let it sit for 10 minutes, pulled it out carefully and it was a sickly yellowy green, swiftly changing to blue!!! OMG, what a feeling that was. Pretty close to orgasmic I think!! Well, for a natural dyer it was! So in went my intended yarn for 10 minutes. It came out the same sickly green, swiftly turning blue. Without a partner, standing right there with the camera you can not get a good picture of this color change. In fact, I have not even seen one to speak of in a dye book or on line. But beleive me, it is cool to watch. I was really thrilled with the blue but felt it needed to be just a tad darker, so it went back in for another 10 minutes. Just about perfect that time. But I still had a lot of dye left so I threw in some shetland I had laying around and got a gorgeous blue on that also. Wish I had some previously dyed yellow to throw in so I would get green. But next time, which there will be very soon. As I still have a ton of indigo and a bit of woad left. And now I know woad will have a permanant place in my dye garden. I will just be careful to keep the self seeding under control so it does not attain noxious weed status here, as it has in many other states.
 Not sure what project will be next. I wanted to immediately start another sweater but not all the yarn has arrived and will need dyed once it does. But I have lots of leftover Cascade 220 in that hamburger gravy color to use up. And I have an idea just how to do that.
